Settings
Settings are template-specific, meaning that they need to be configured in each template but are also included in the template if it is sent to another user. You can access these by clicking Settings in the ribbon:

Clicking on the button opens the Settings window. Menu items can be found on the left to access different settings.

General > Overview
Name
The name of the template.
Use document file name
When enabled, the name of the template will be the name of the Word file.
Format Culture
The default culture in which the data will be formatted if no format is specified in the tag. If No culture is selected, it uses the machine on which the template is generated.
Data Culture
The default culture in which the data will be read from the data sources. If No culture is selected, it uses the machine on which the template is generated. It is suggested that the systems passing the information to the template uses the Invariant culture.
Description
The description of the template.
Tag
Defines how the Experlogix tags will be surrounded when inserted.
General > Advanced
These settings are meant to be changed by advanced template designers and are rarely changed.
Version
The version of the template.
Language
The programming language of the template. Options are C# and VB.
Sign assembly
When enabled, you can secure your assembly with a generated certificate.
Methods extraction
When enabled, there's additional logic that will split the generated code into multiple methods. It has an impact on the compilation of the template and should only be used with big templates.
References > Assemblies
Dll files created by developers can be uploaded from your computer and referenced in the template. To reference an assembly, click on the "Add from computer" button and browse for the file.
To reference .NET Framework assemblies, click on the "Manage assemblies" button.
Enabling the "Embed" option will include the dll as part of the compiled template, meaning that the dll referenced by the template doesn't need to be deployed in the Xpertdoc Portal.
References > NuGet packages
To reference a NuGet package from the nuget.org packages gallery, click on the "Manage packages" button.
Package can be restored from a template if they aren’t already locally installed but referenced by the template by clicking on the "Restore packages" button.
References > Namespaces
In addition to default ones, additional namespaces may need to be added if a references to assemblies or NuGet packages exist.
To add a namespace, clicking on the "Manage Namespaces" button, select the assembly or NuGet package, and then check the check boxes of the namespaces you want to include.
Properties
The properties are used to define the parameters the template expects to receive at execution time. The properties are exposed publicly when the template’s dll is referenced by a system.
There needs to be a mandatory "XmlData" property. This property is created automatically if the template is using a Data source with the “Prepare for Portal” option enabled.
Test cases
The test cases provide a means to assign test values to your template Properties so that results can be previewed locally. To add a test case, click on the "Add a new test case" button.
When previewing the template using a test case, here's the order in which the elements are processed:
- The test case Pre Execution Code is processed
- The test case sets the Properties of the template
- The template's Pre Execution Code is processed
- The template' body (Word document) is processed
- The template's Post Execution Code is processed
- The test case Post Execution Code is processed
Default Test case
The user can mark a single test case as the default test case. The default test case is the one executed when clicking on the "Preview" button.
Data source
Every data source defined in the template is listed. When a row is selected, the data source configuration is shown. If the user wants to override the default data source configuration, he needs to enable the "Customize" button on a specific data source. Then, the user has the ability to update the configuration.
Properties
Every defined property and their default value in the template is listed. To assign a value to that property when running the test, add it in the associated "Value" text box.
Pre Execution
Any valid code the user wants to be processed before the template is executed can be entered in this section (e.g. Complex logic to set test values to template's Properties).
Post Execution
Any valid code the user wants to be processed after the template is executed can be entered in this section (e.g. Modify the Word document's layout, call a web service). This is rarely used.
Data sources
Provide access to sources of information to use in your templates. To add a data source, click on the "Add data source" button and select the data source type. It is suggested to give the data source a relevant name. The data source name needs to be unique per template.
XML data source
Adding an XML data source can be done by selecting the "Structured data > XML" option.
When configuring an XML data source, the user can provide an XML structure and a schema (.xsd). Both structures can be typed manually or the user can click on the "Browse for XML"/"Browse for XSD" buttons to select files accessible from his machine. When enabling the "Prepare for Portal" option, the template creates a hidden property (e.g. XmlData) so that the template can be executed from the Xpertdoc Portal.
Smart Form data source
Adding a Smart Form data source can be done by selecting the "Xpertdoc > Smart forms" option.
When configuring a Smart Form data source, the user will need to connect to an Xpertdoc Portal instance. Once connected, the user needs to navigate down to a Smart Form record, which is part of a Template Group, which can be found under Template Library (highest level). Once selected, the user can browse for an XML or select a Portal Previous execution for preview purpose. A Portal connection needs to exist in order to create a Smart Form data source.
Smart Flows template
Adding a Smart Form data source can be done by selecting the "Xpertdoc > Smart Flows template" option.
When configuring a Smart Flows template data source, the user will need to connect to a Smart Flows instance. Once connected, the user will be listed with existing Smart Flows template of type "Xpertdoc Template Designer. The template in Smart Flows needs to be created prior to trying to open it from Template Designer. Once selected, the XML structure of the data sets associated to the Smart Flows template will be copied as the sample data. If the Data Sets change in Smart Flows, the data source should be refreshed.
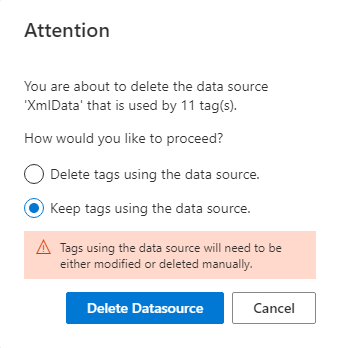
Deleting a data source
If no tag for a specific data source exists in the document area, the data source will be deleted instantly. If tags are coming from the data source, there will be a pop-up asking what the user wants to do. If the "Keep tags using the data source" option is selected, the template won't compile. These tags will need to be adjusted or deleted manually.