Options
Template Designer has options that allow you to tailor it to your needs. Options are machine-specific and rarely changed once set up.

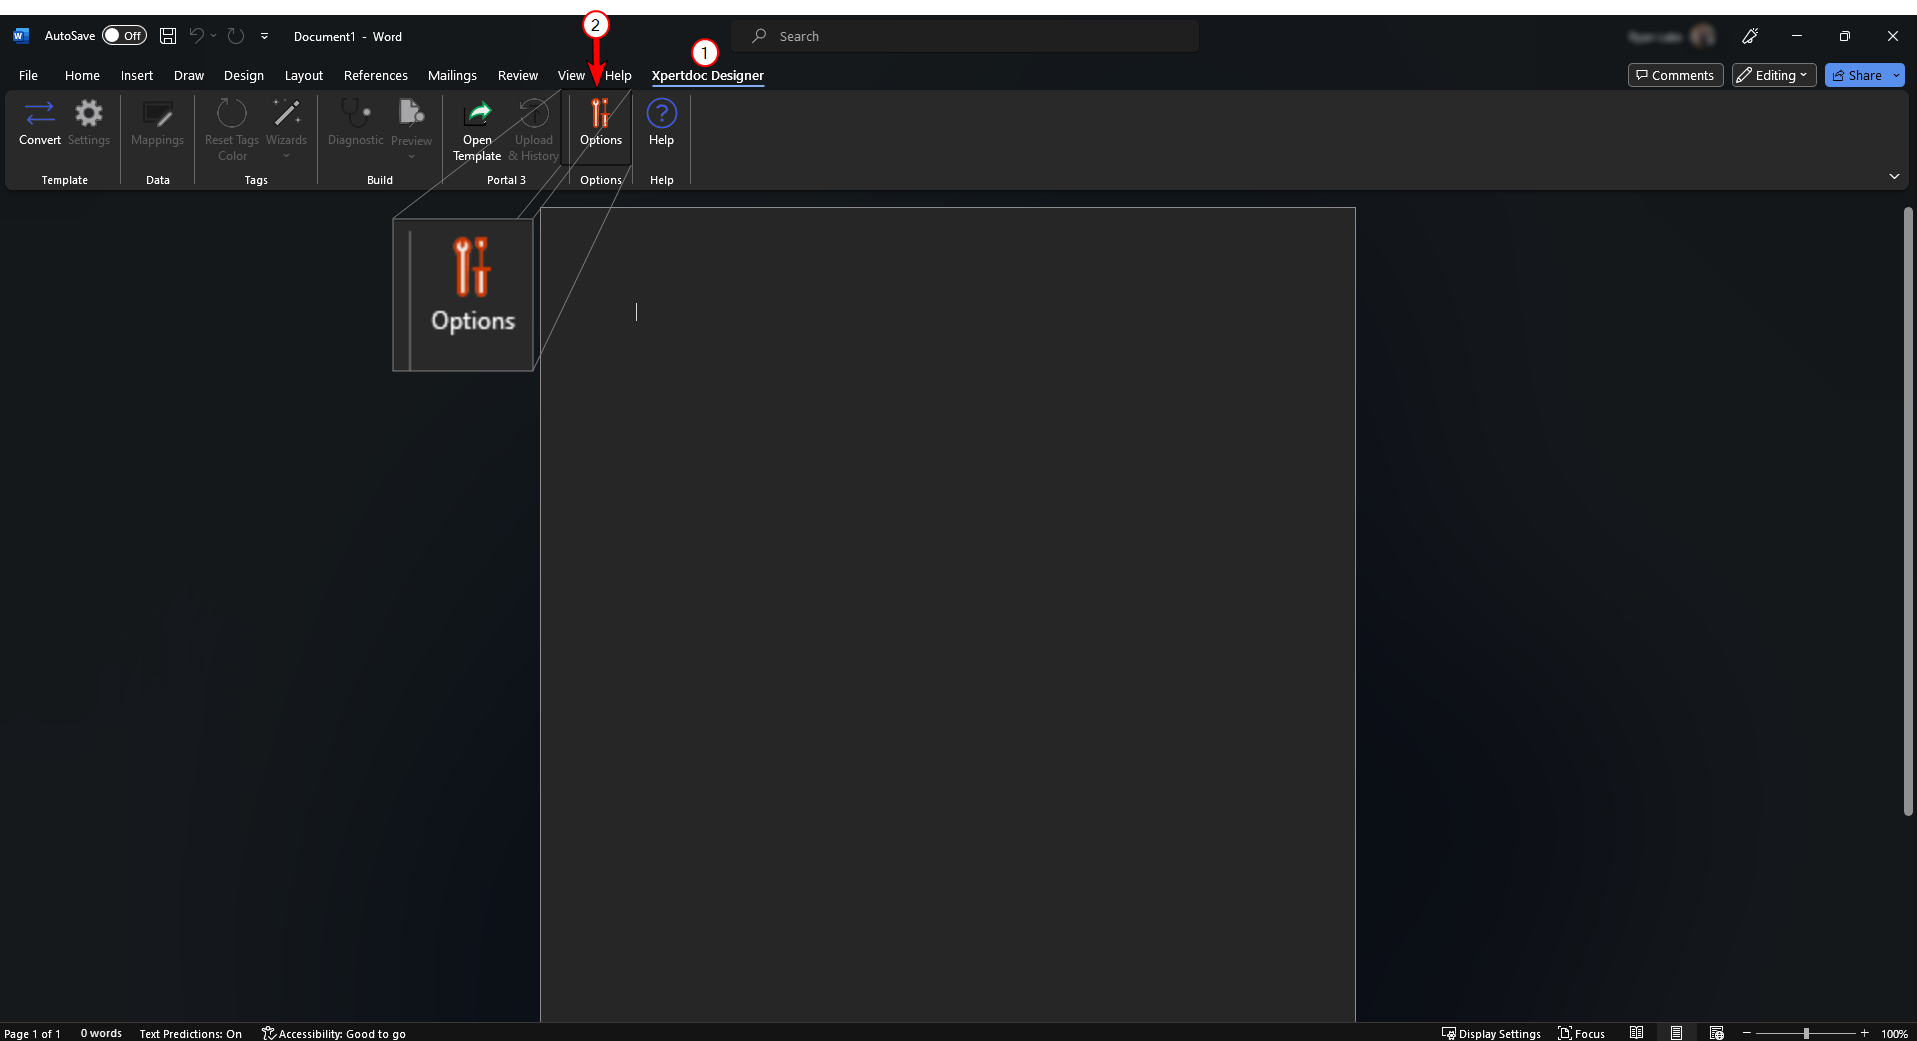
Opening the Options Menu
Selecting Options in the Xpertdoc Designer tab opens the Options dialog. The menu options on the left open the different options available.
General
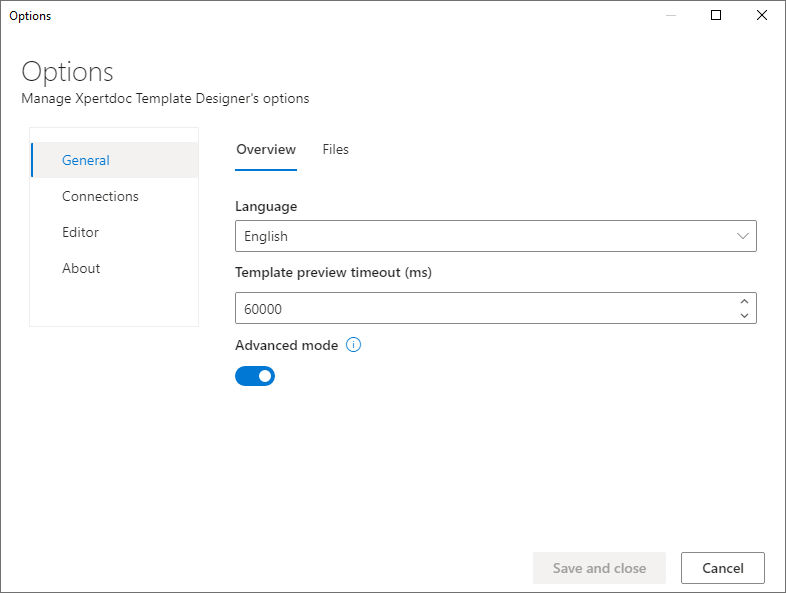
Overview
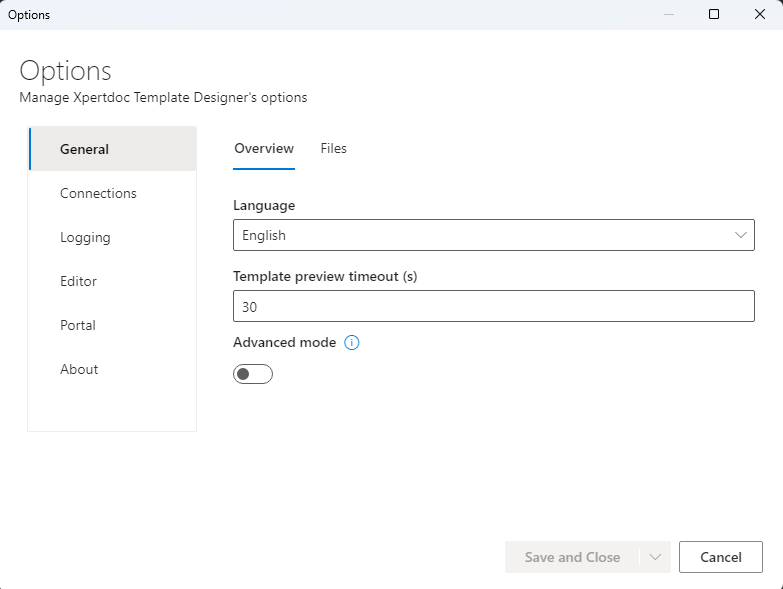
General Overview parameters
|
Field |
Description |
|---|---|
|
Language |
Defines the display language for the Xpertdoc ribbon. Available options are English and French. |
|
Template Preview timeout (ms) |
Value in milliseconds allowed for Template Designer to preview a document. The previewing process stops unless a document previews within that time frame. |
|
Advanced mode |
When enabled, more advanced features, including buttons in the ribbon, are accessible. |
Files
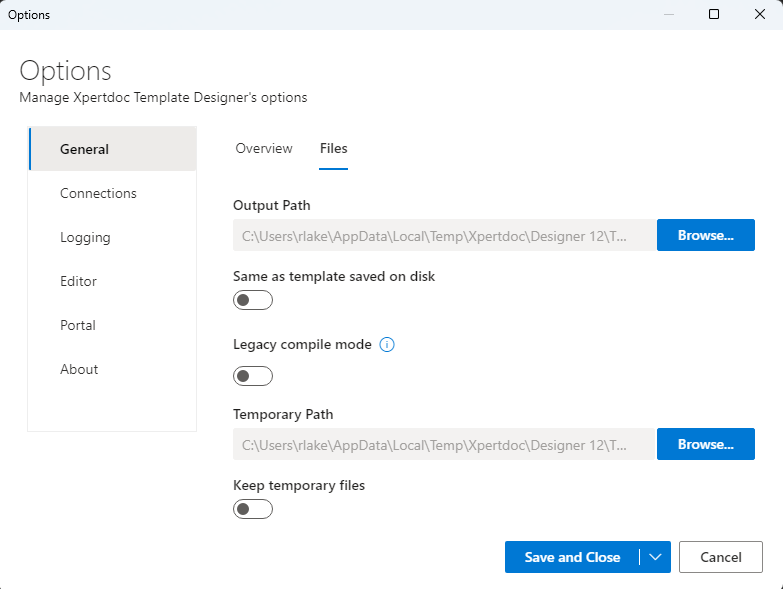
General Files parameters
|
Field |
Description |
|---|---|
|
Output path |
Designates the path where the Template Designer saves files to preview the template. |
|
Same as template saved on disk |
When enabled, it creates the files needed to preview the template next to the template's location. If your template is not saved on disk, we will still use the output path. |
|
Legacy compile mode |
It forces a save the program to save to the local disk before compiling. When enabled, you'll get better performance with big templates. |
|
Temporary path |
Designates the path where the Template Designer will save temporary files to preview the template. |
|
Keep temporary files |
When enabled, the temporary files won't be automatically deleted after the preview. |
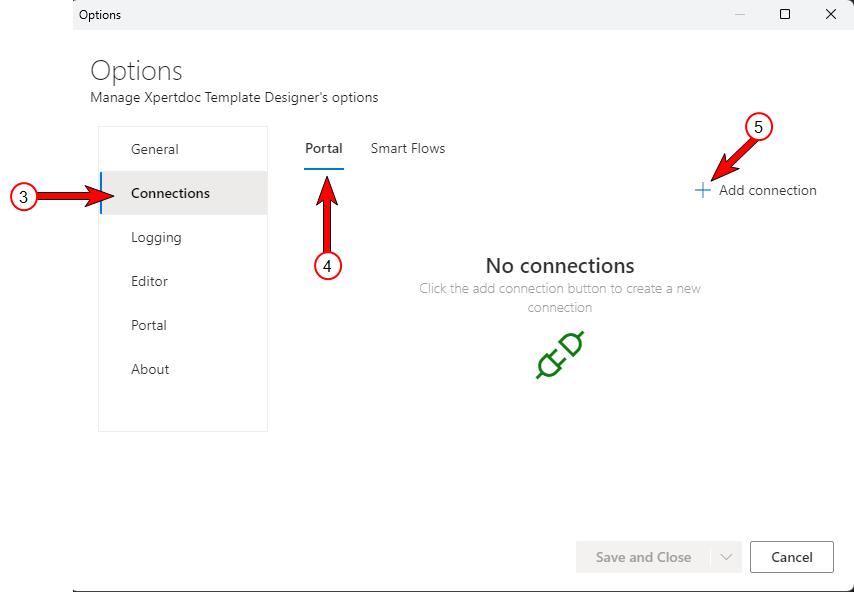
Connections
Add a Portal connection
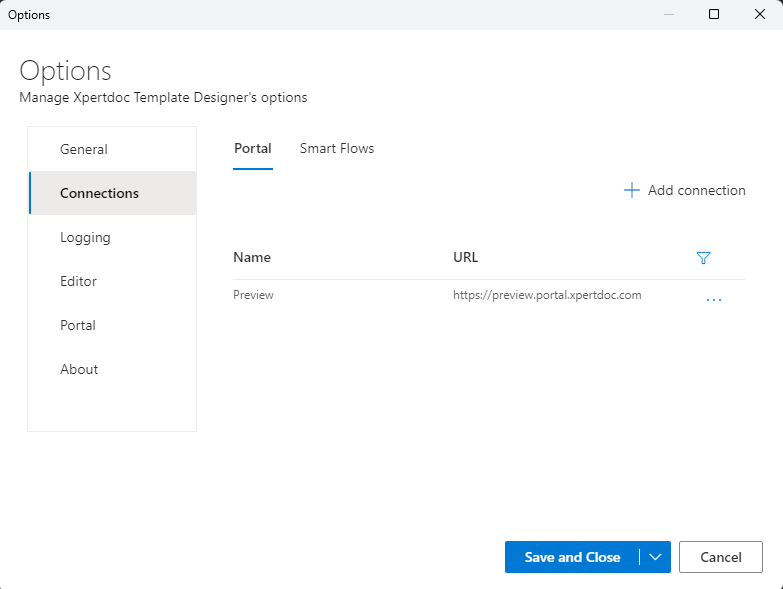
This section allows you to create connections to the Experlogix Portal to open or upload templates.
| 1. | In Microsoft Word, select the Xpertdoc Designer tab. |
| 2. | Select the Options button. |
| 3. | In the side-navigation, select Connections. |
| 4. | Select the Portal option. |
| 5. | Select Add connection. |
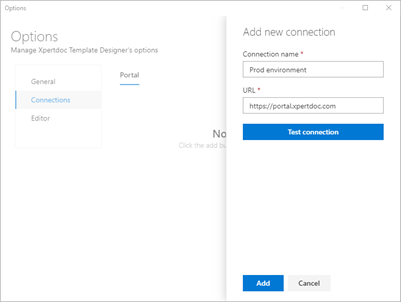
| 6. | In the Connection name field, enter a name for the connection. |
| 7. | In the URL field, enter the URL for your Portal instance. |
| 8. | Select Test connection. |
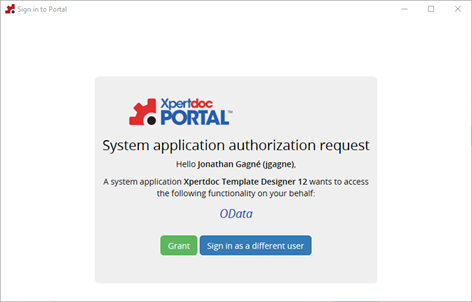
The Portal log-in dialogue displays.
| 9. | The user will be asked to enter Portal credentials or automatically log in, depending on how the instance is configured. |
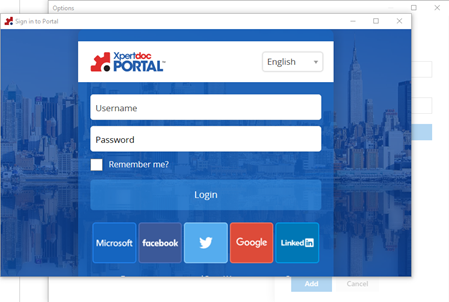
| 10. | Select the Grant button to authorize Template Designer to connect to the Xpertdoc Portal. |
Template Designer uses OAuth to connect to a Portal instance.
| 11. | Select the Add button. |
Your Portal instance displays in the List view.
| 12. | Select Save and Close to exit the Connections dialogue. |
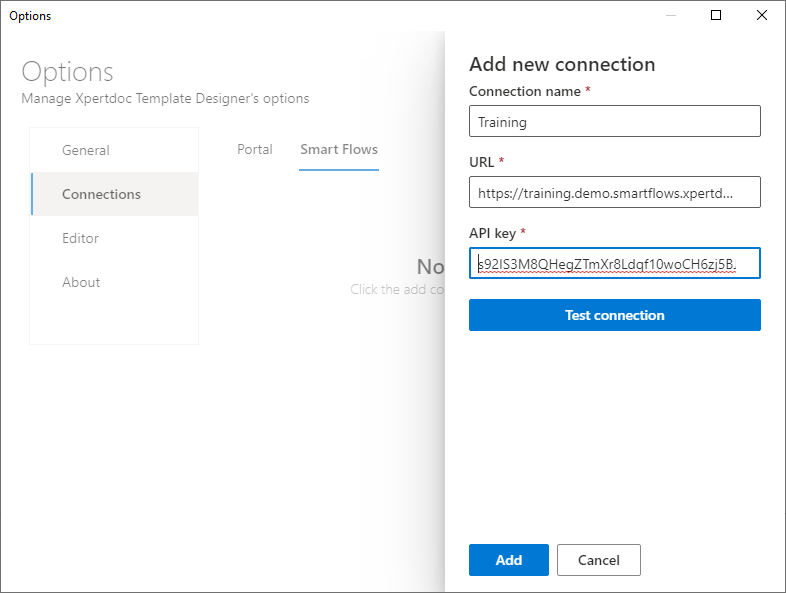
Add a Smart Flows connection
This section provides a guided walkthrough on creating a connection to an existing Smart Flows project.
| 1. | In Microsoft Word, select the Xpertdoc Designer tab. |
| 2. | Select the Options button. |
| 3. | Select Connections in the side-navigation. |
| 4. | Select the Portal option. |
| 5. | Select Add connection. |

| 6. | In the Connection name field, enter a name for the connection. |
Only include up to the .com of the URL. If you include the entire URL, it can cause the connection to fail or time out. Ex:https://xyz.xyz01.smartflows.xpertdoc.com/
| 7. | In the URL field, enter the URL for your Portal instance. |
| 8. | Enter an API key for your user. |
The API key should be provided to you by your organization's Smart Flows Administrator.
| 9. | Select Test connection. |
| 10. | Select the Add button. |
Your Smart Flows instance displays in the List view.
| 11. | Select Save and Close to exit the Connections dialogue. |
Logging
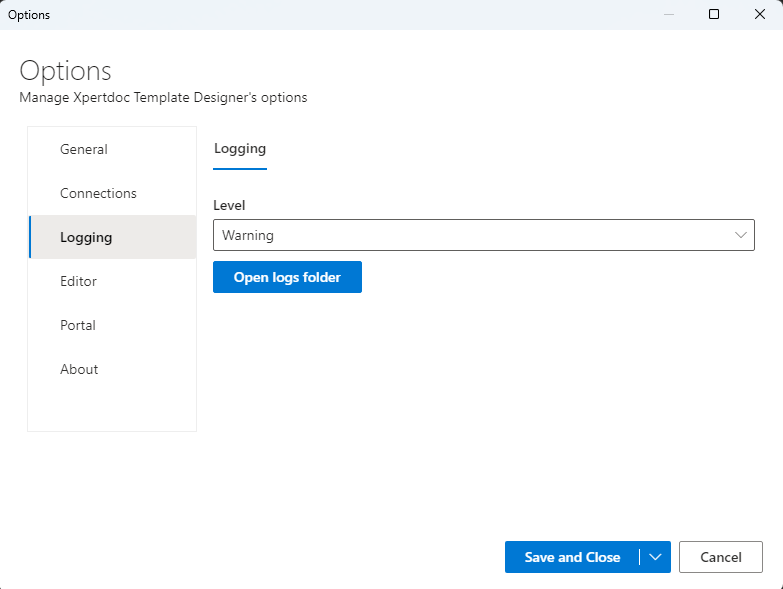
Logging Parameters
|
Field |
Description |
|---|---|
|
Level |
Determines the amount of logging the application captures. For example, when Warning is selected everything warning and above is logged. The logging level can affect performance, so we recommend only setting to trace or debug when troubleshooting an active issue. |
|
Open logs folder |
Opens the logs folder. |
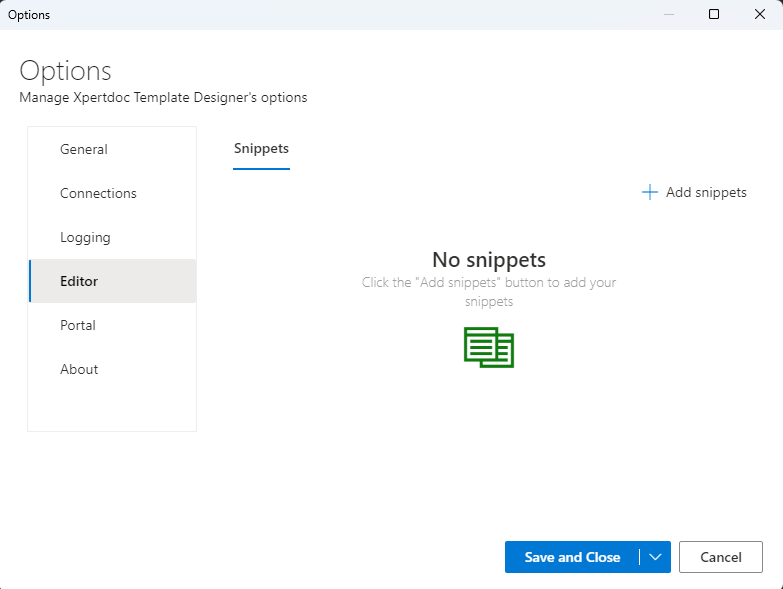
Editor
Snippets
Allows you to reference JSON snippet files. Traditionally developers will create snippets for your entire organization to use, refer to Creating a snippet file.
Portal
Files
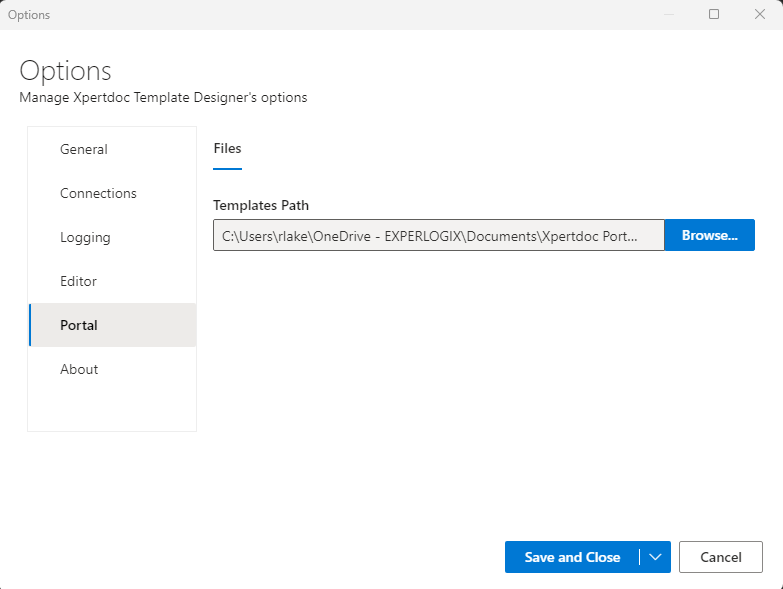
Portal Files parameters
|
Field |
Description |
|---|---|
|
Templates Path |
Designates where to save templates on the local drive. When you open a template from Portal, templates are saved to this location. |
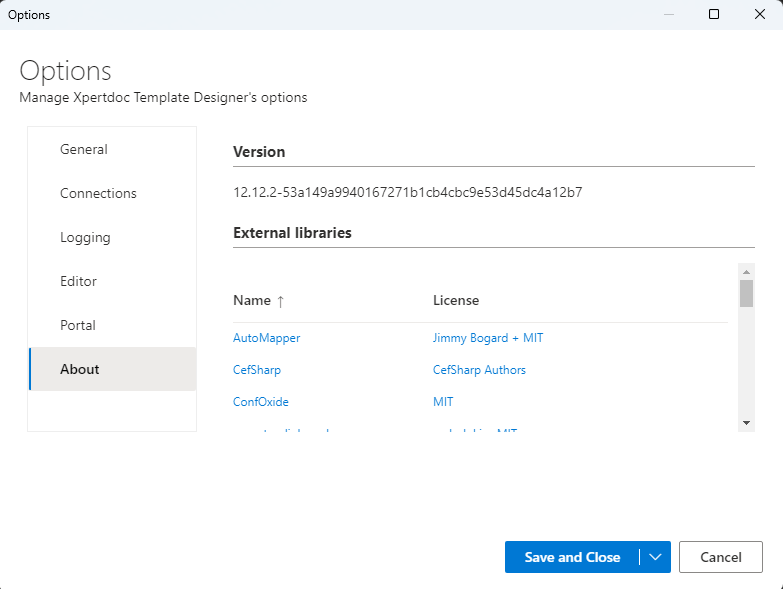
About
Shows the version number of the Template Designer application and lists all referenced libraries.