Trigger Smart Flows from the Power Platform
In this section, we explain how Experlogix Smart Flows can be triggered directly from Power Automate to:
- Execute a Smart Flows
- Retrieve the generated documents
Using Power Automate
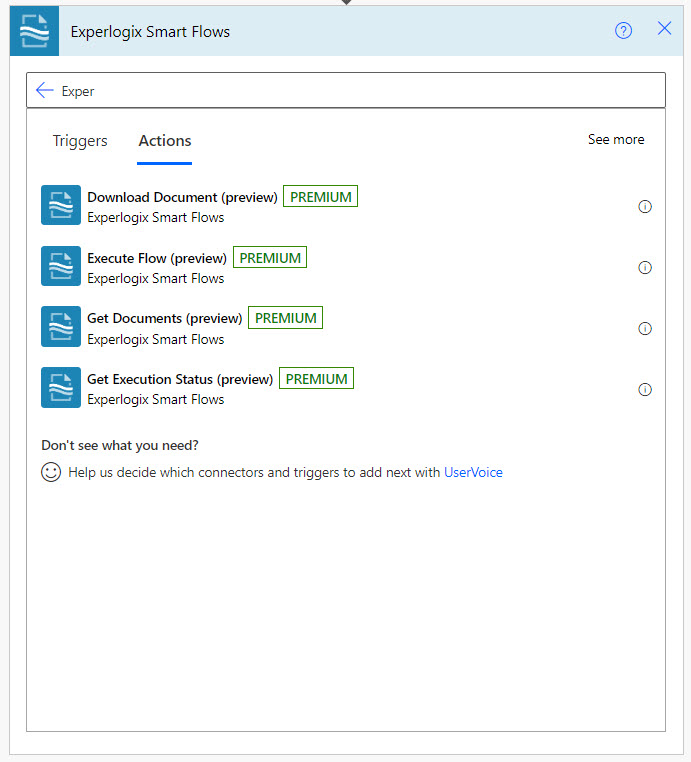
In Power Automate, the Experlogix Smart Flows currently gives access to four actions.
For more details on the Experlogix Smart Flows Connector, refer to our Microsoft Connector Reference Docs.
In the following example, we will go step by step to create an automated flow in Power Automate and call Smart Flows to generate and retrieve that generated document.
Create the flow
| 1. | In Power Automate, create a new automated flow. |
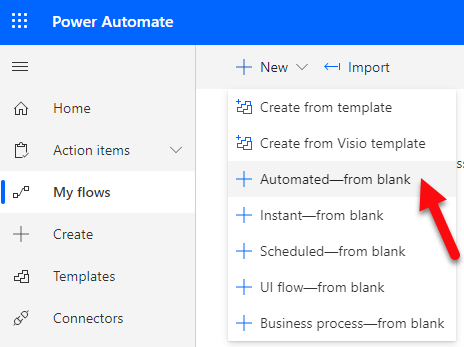
| 2. | Give a name to your flow, search for the trigger Record updated, and select When a record is updated as the trigger. |
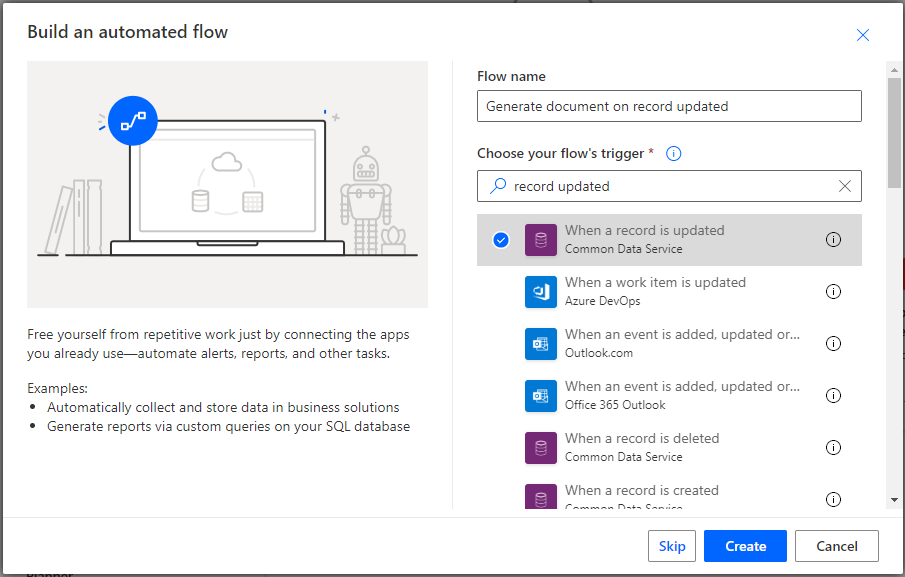
| 3. | Click the Create button. |
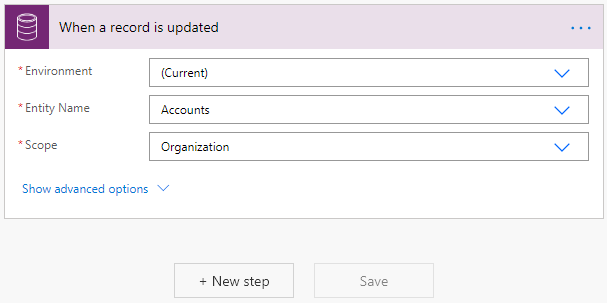
| 4. | Configure the trigger step. In this example, we want to generate a document when an account record is updated. |
| 5. | Click on + New Step to add a new step. |
| 6. | Type Experlogix in the Search connectors and actions search box. |
| 7. | Select the Execute Flow action. |
If you are using the Experlogix connector for the first time, you'll be presented with the following step layout to configure the connection to Smart Flows. Please continue to Configure the connection to Experlogix Smart Flows
If you already have a connection to Smart Flows configured in Power Automate, skip to Configure the Execute Dynamics Flow step.
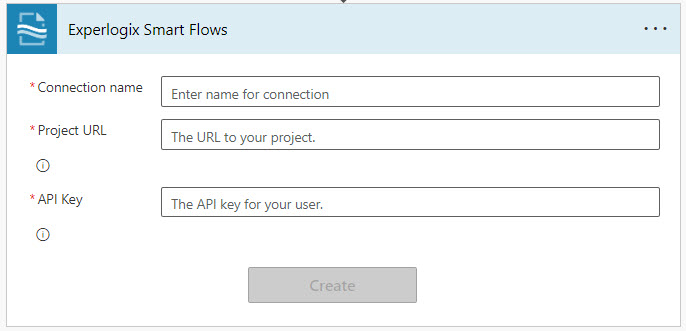
Configure the connection to Experlogix Smart Flows
| 1. | Fill in the information to create the Execute Flow action: |
| 1.1. | Connection Name: Name to identify the connection to Smart Flows in Microsoft Power Automate |
| 1.2. | Project URL: URL to the Smart Flows project. (Ex: https://MyProject.smartflows.xpertdoc.com) |
| 1.3. | API Key: API key used to authenticate the user in Smart Flows. For more info on how to get an API key, click on See Documentation. |
| 2. | Click on Create to continue. |
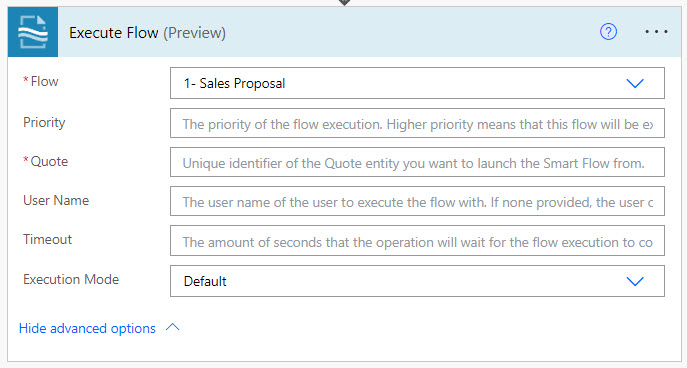
The Execute Flow action displays.
Configure the Execute Dynamics Flow step
Now that the connection to Smart Flows is created, we can configure the Power Automate flow to actually call the execution of a document.
The system automatically recognizes the entity used in the Experlogix Smart Flows. In our example, Quote is the entity we for the example flow in Smart Flows. However, if you have a different entity in use, you will see something different for your entity.
| 3. | Configure the Flow Execute action. |
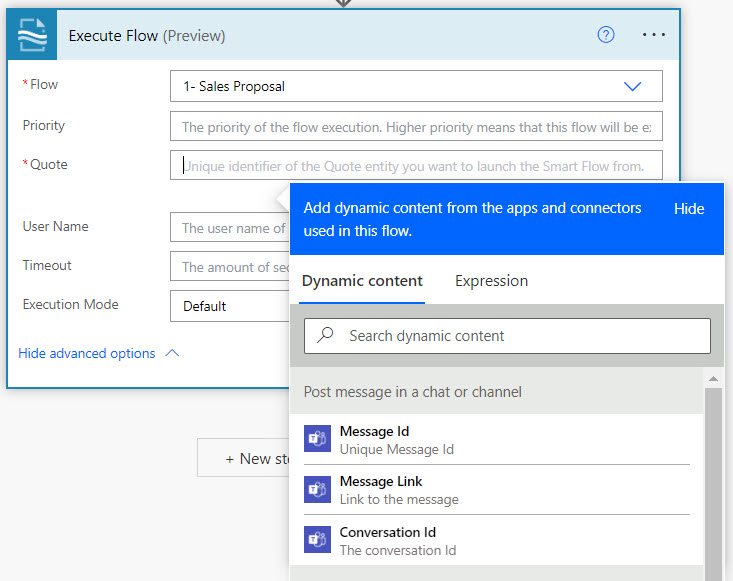
| 3.1. | Entity: Use dynamic content to select the updated record. |
| 3.2. | Flow: Select the flow to execute in Smart Flows. |
Decision Point
If a user name is specified, the API key configured for the connection to Smart Flows must be for an administrator in Smart Flows.
There are two options involving the user name:
- Connection is configured with a connected user's API key (Dynamics user synchronized in Smart Flows), and no user name is provided in the Execute Flow action.
- Connection configured with the API key of a native user having the role 'Administrator' in Smart Flows and the user name of a connected user for the Execute Flow action.
| 3.3. | User Name: Type the Experlogix Smart Flows username when running the flow or leave it empty to use the same username used in Power Automate. |
| 4. | Click the Save button to save your flow. |
Now each time the system updates an account record in Dynamics, the system executes the selected Smart Flow.
Configure the Get Documents step
To complete our example, we now need to get the result of the execution. We need to add another step in the current Power Automate flow to do so.
| 1. | Click on + New Step to add a new step. |
| 2. | Type Experlogix in the Search connectors and actions search box. |
| 3. | Select the Get Documents action. |
| 4. | Use dynamic content to assign the Execution. |
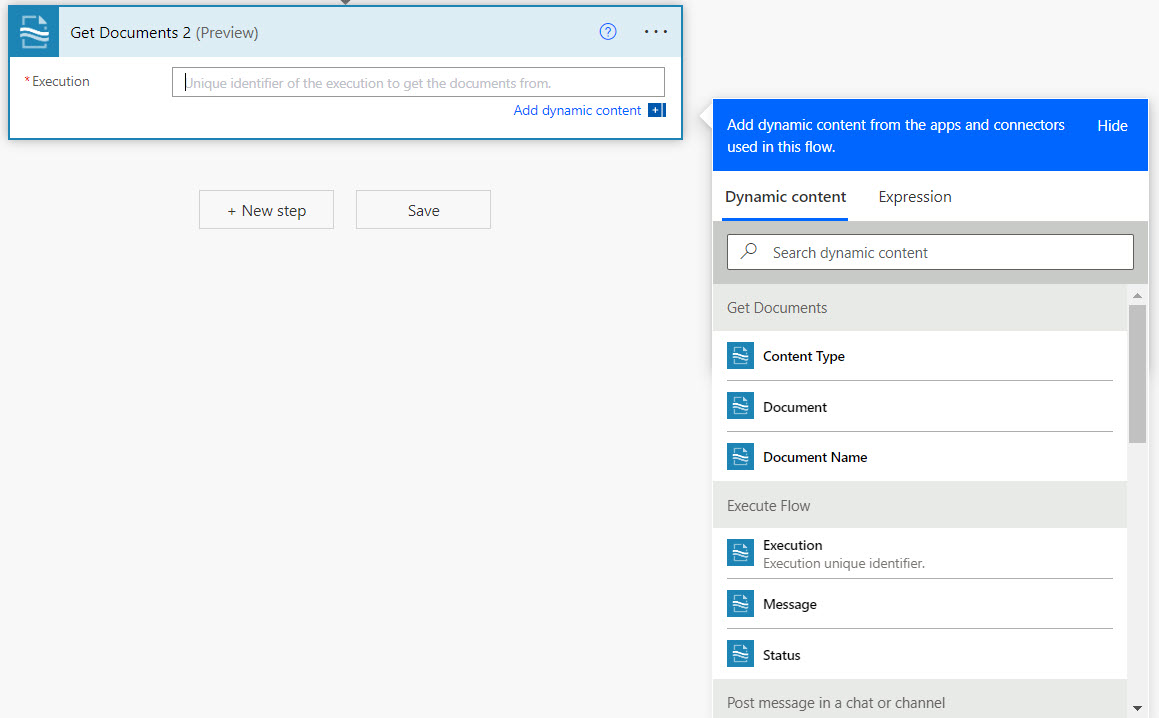
| 5. | Click Save to continue. |
At this stage, the document(s) is(are) retrieved, but we are not doing anything with it.
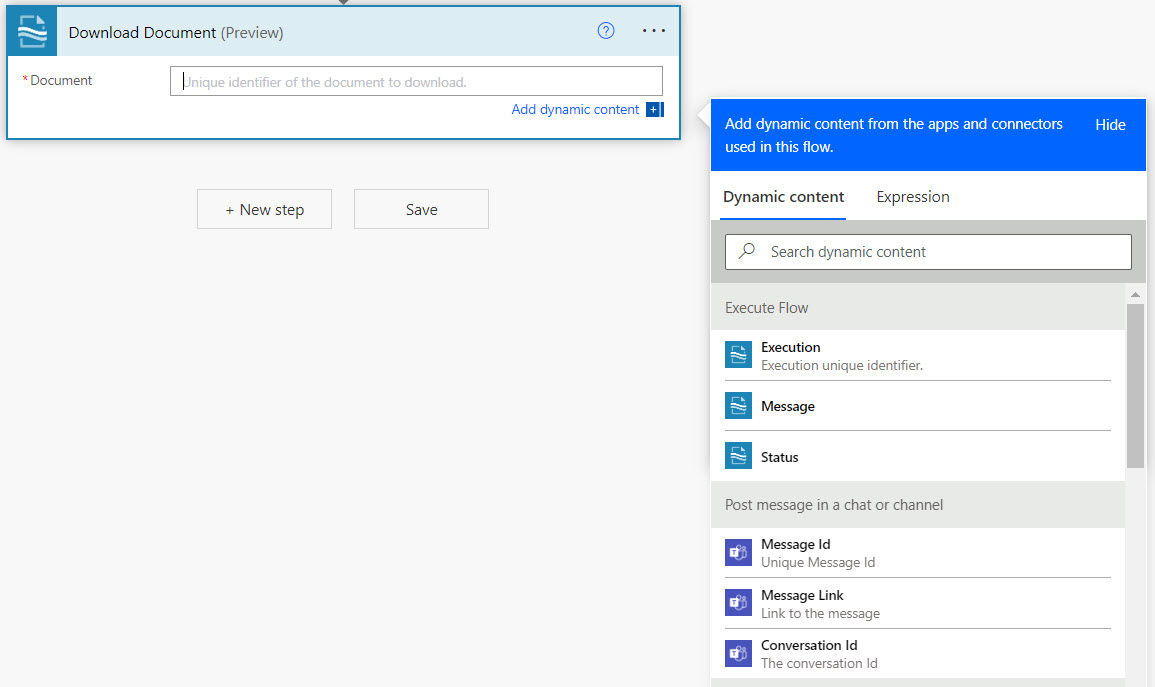
Configure the Download Document
To finish this example, we’re storing the generated document(s) in Microsoft SharePoint.
| 1. | Click on + New Step to add a new step. |
| 2. | Type Experlogix in the Search connectors and actions search box. |
| 3. | Select the Download Document action. |
When you select Download Document, Power Automate switches to Apply to each, automatically applying an action on each retrieved document.
| 4. | Using dynamic content, select Document. |
| 5. | Click on + New Step to add a new step. |
| 6. | Search for SharePoint. |
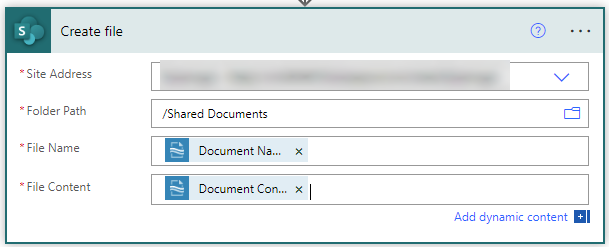
| 7. | Select Create file. |
We are storing the documents in the Shared Documents library of SharePoint. We used dynamic content to set the File Name using the Document Name from Smart Flows and the Document Content for the file content.
| 8. | Click the Save button to save your flow. |
Congratulations, you’ve completed the flow creation in Microsoft Power Automate.
Using Power Apps
For instance, you want your users to generate a document from a Canvas App. The easiest way to do this is to add a button and call a Power Automate flow. You only need to provide the record id to reference your flow.
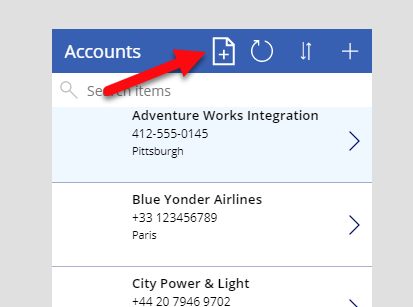
In this example, a Canvas App was created using Common Data Service as the data source with the Account entity. By default, the app uses a browsing gallery to show the accounts' list. What we did was add a new icon at the top.
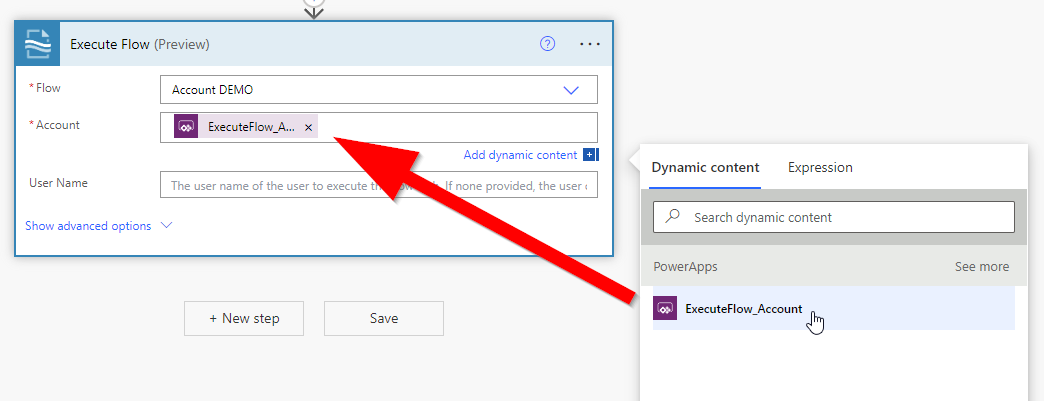
On that icon, an action of type Power Automate has been configured to call a flow. The flow looks like this:
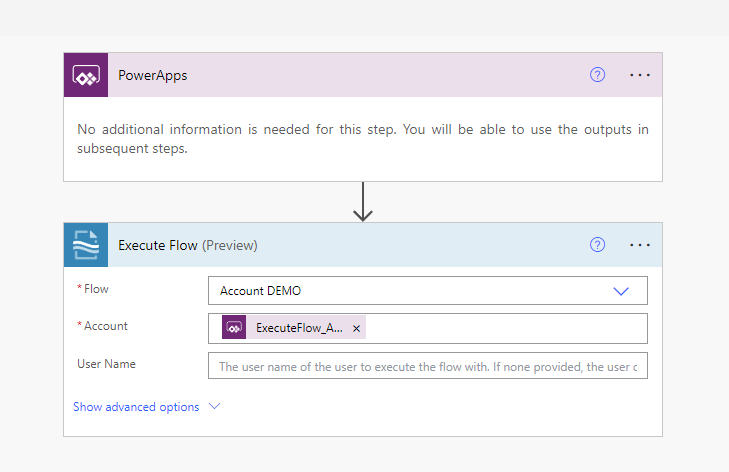
The Execute Flow action expects the entity (GUID), and the value must come from the PowerApps step. You can use dynamic content to configure the parameter.
Back in PowerApps, we must configure the action to call the flow we just configured. To do so, we used the following syntax:
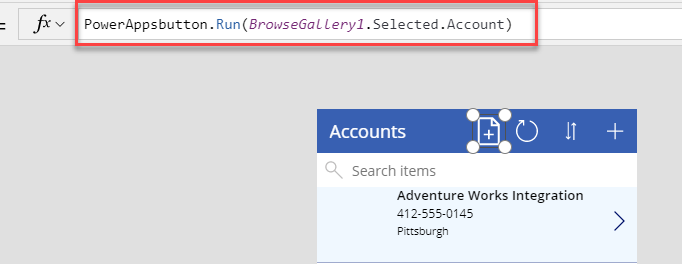
PowerAppsButton is the name of the flow we created in Power Automate. We call the Run function on the flow and provide the selected account.
We are now able to generate a document from a Canvas App. Now, it's up to you and your imagination to develop ideas on how to use Experlogix Smart Flows from Power Apps.