OneSpan Sign
When you generate a document that contains a OneSpan Sign electronic signature, one of two things will happen:
- Either you get a link that redirects you to the signing procedure. This is called sign in person, where the person that needs to sign is there with you.
- Either an e-mail is sent to the party that needs to sign the document. This is called sign by e-mail.
You can insert multiple signatures in the same document, but you cannot mix sign in person with sign by e-mail signatures.
Settings in Template Builder
Signer
The Signer part shows who is the signer of the signature. You need to check the option 'Insert OneSpan Element' to be able to configure the signer.
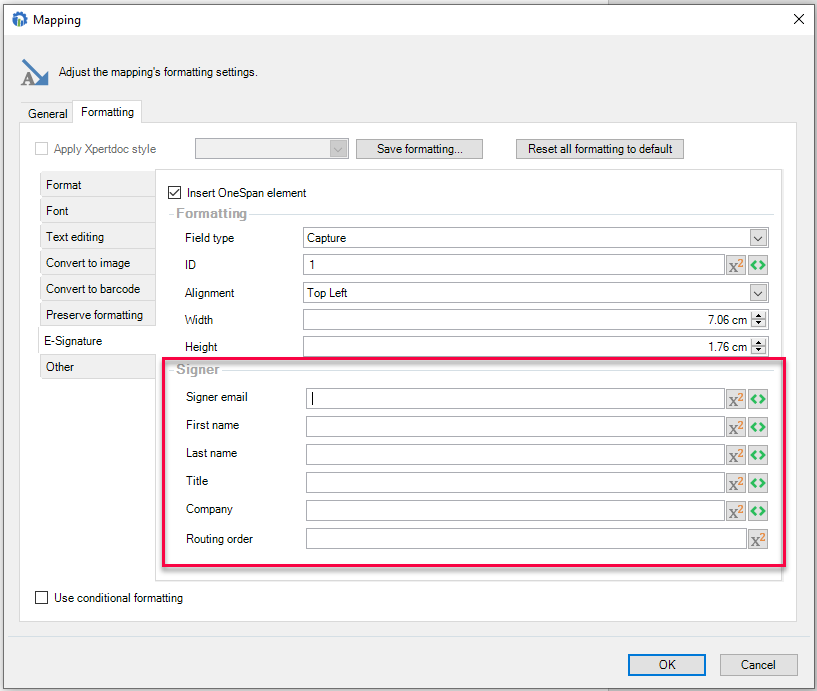
- The Signer E-mail field should contain the e-mail address of the signer.
- The First Name field should contain the first name of the signer.
- The Last Name field should contain the last name of the signer.
- The Title field should contain the Title of the signer
- The Company field should contain the company of the signer
The Routing order field should contain a number that indicates in which order the signer will sign the document.
The following scenario may happen:
- You have multiple signatures with routing order X
- You have at least one signature with a routing order greater than X
In this scenario, the document will first be sent to all the recipients whose signatures have the routing order X. After EVERYONE signs/declines the document, only then will the recipient from the other signature get the document to sign.
Formatting
There are 8 field types for a signature blocks.
- Full name: During the signing ceremony, the signer simply clicks the block and its full name is then stamped on the block.
- Initials: During the signing ceremony, the signer simply clicks the block and its initials are then stamped on the block.
- Capture: During the signing ceremony, the signer simply clicks the block and draws its signature.
- Mobile Capture: A recipient writes its signature in a mobile browser using their fingertip or a stylus. Must be configured at the account level.
- Signature Date: The signature date is automatically inserted at the block's location after the signer completed the signature ceremony.
- Signer name: The signer name is automatically inserted at the block's location after the signer completed the signature ceremony.
- Signer title: The signer title is automatically inserted at the block's location after the signer completed the signature ceremony.
- Signer company: The signer company is automatically inserted at the block's location after the signer completed the signature ceremony.
A signature looks like this:
And this is what an initial looks like:

Settings in Smart Flows
To send a document to OneSpan Sign from a Smart Flow, simply add the block Send to OneSpan.
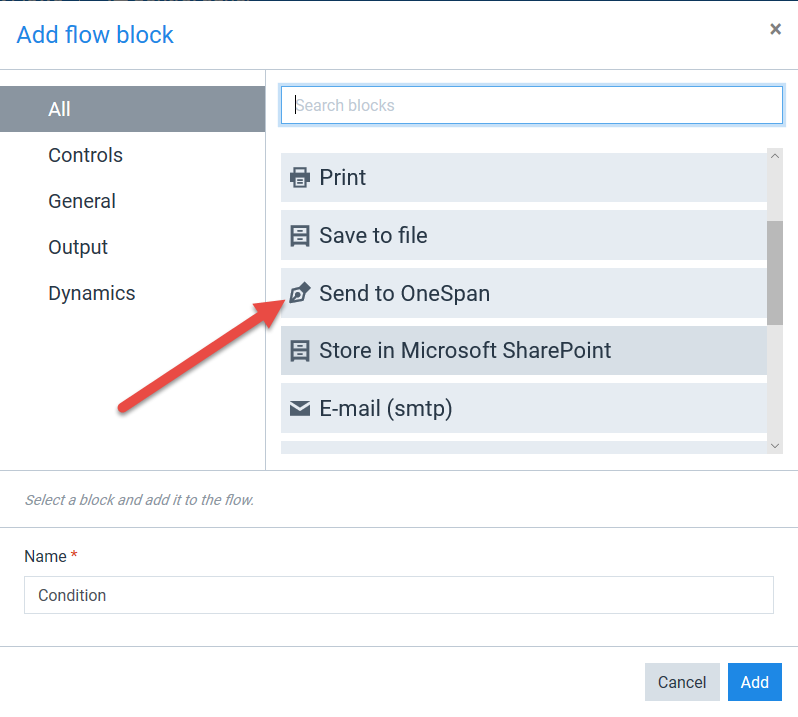
The Send to OneSpan is then part of the Smart Flow and can be configured by selecting it.
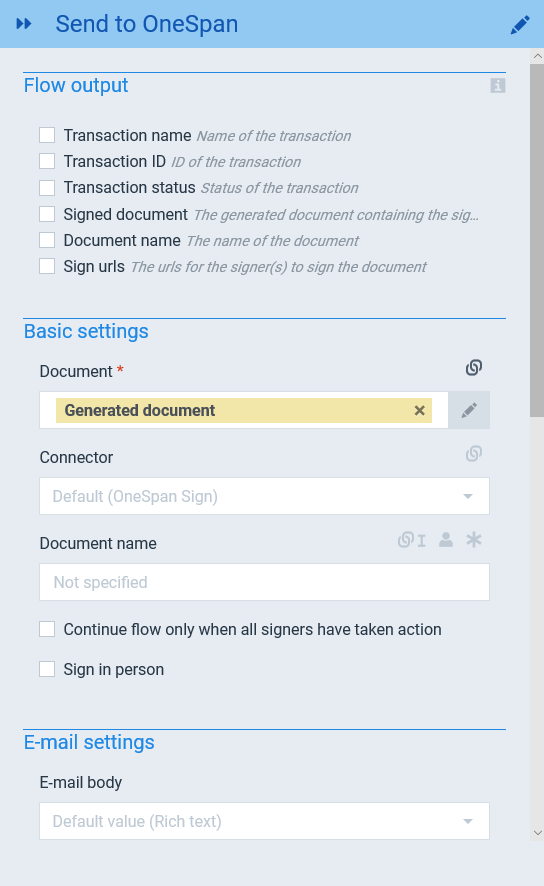
Flow Output
This section contains all the output elements of the Send to OneSpan block. Some of them could then be used as input element in subsequent steps of the flow.
- Transaction Name Name of the transaction. If not specified in the Transaction Setting, defaulted to the name of the template with a timestamp
- Transaction ID ID of the transaction. If not specified, auto-generated identifier
- Transaction Status Status of the transaction.
- Signed Document The generated document containing the signature
- Document Name The name of the document
- Sign URLs The URLs for the signer(s) to sign the document. (Only when Sign in person is checked)
Basic Settings
- Document Document to be signed.
- Connector Connector of type OneSpan (must be previously configured from the Control Panel → Connectors)
- Document Name Name of the document. If not specified, defaulted to the name of the template with timestamp. The document name is used in communications to the signer and sender.
- Continue flow only when all signers have taken action If checked, the flow will wait until all signers take action (sign, opt-out or decline) before resuming.
- Sign in person If checked, sign url available for the signer in the flow results.
E-mail settings
By default, a OneSpan Sign account is configured to send an e-mail to a signer with a link allowing that signer to sign the document. When sending a document for signature using a Smart Flow, you have the option the provide content for a section of that e-mail.
- E-mail body You select if the content is provided by a Rich text control, a document or from the execution of a template.
- E-mail message Rich text control (available only when selected e-mail body is Rich text) allowing the user to enter some free text. Outputs from previous steps can be used as well.
- E-mail document Document selection (available only when selected e-mail body is Document)
- E-mail template Template selection (available only when selected e-mail body is Template)
Transaction settings
In this section, you can provide information to be linked to that specific electronic signature transaction (for tracking purposes) and configure some additional transactions parameters.
- Transaction name The name of the transaction.
- Transaction description The description of the transaction
- Expiry date Use to specify a date after which the transaction can no longer be signed
- Transaction timezone Timezone in which the signer is located. Used to calculated expiration date and provided significant reminders (if configured)
- Transaction language Used to set the language of e-mail(s) sent to signer(s), and also the language of signing ceremony user interface on the OneSpan Sign platform.
Reminder settings
By checking the option, you can configure reminders for the signer(s).
Days until the first reminder Number of days, from the date the transaction was created, until the first reminder is sent.
Repeat the reminder When checked, the reminder is repeated, using the configured number of days, until the expiration of the transaction (or if the signer actually sign the document).