Installing Smart Flows
To download the server component (a zip file), you will need a MyXpertdoc Account. You can request access through our Client Success Team, or you will get it after purchasing the license. There are two methods of installing Smart Flows. The traditional install that installs Smart Flows on your computer or by using containers, such as Docker Desktop, allows you to install Smart Flows in a container environment.
Note: We recommend using the AdoptOpenJDK 21 LTS build using the Hotspot VM, select here to download.
Please contact Experlogix Support if you need help in updating Java.
Traditional Install
Unzip the server component
| 1. | Unpack the ZIP file in the installation folder (C:\Xpertdoc-SmartFlows\). |
| 2. | Rename the folder to be meaningful. |
Create the application.properties file
In the example below, the saved location is project-prod.
| 1. | In the project folder, create a blank text file and save it with the name application.properties. |
server.port=443
project.baseurl=https://xsfl-server:443server.ssl.key-store=../yourpfxfile.pfx
server.ssl.key-store-password=yourpfxpassword
server.ssl.key-store-type=pkcs12project.datasource.jdbc-url=jdbc:sqlserver://PRD-V-SQL-DB02;database=XprtDoc;encrypt=true;trustServerCertificate=false;
hostNameInCertificate=*.database.windows.net;loginTimeout=30;lockTimeout=5000;socketTimeout=300000
project.datasource.username=sa
project.datasource.password=secretsapasswordsample.user.password=secretadminpassword
# Uncomment when using HTTP instead of HTTPS:
# cookie.secure=falseSSL CertificateThe use of SSL![]() Secure Sockets Layer, is an encryption-based Internet security protocol. It was first developed by Netscape in 1995 for the purpose of ensuring privacy, authentication, and data integrity in Internet communications. SSL is the predecessor to the modern TLS encryption used today. encryption is required for the Smart Flows system to function. To enable SSL encryption, you need an SSL Certificate that matches your FQDN.If you install multiple projects on one server, you can also use a wildcard certificate
Secure Sockets Layer, is an encryption-based Internet security protocol. It was first developed by Netscape in 1995 for the purpose of ensuring privacy, authentication, and data integrity in Internet communications. SSL is the predecessor to the modern TLS encryption used today. encryption is required for the Smart Flows system to function. To enable SSL encryption, you need an SSL Certificate that matches your FQDN.If you install multiple projects on one server, you can also use a wildcard certificate![]() a digital certificate that is applied to a domain and all its subdomains. Wildcard notation consists of an asterisk and a period before the domain name. Secure Sockets Layer (SSL) certificates often use wildcards to extend SSL encryption to subdomains. for the CN . For example *.base.domain.com with *base.domain.com and base.domain.com as alternative names. The "*base" component of the address serves as a a "fill in the blank" to properly direct to all versions of the address that end in ".domain.com"Certificate Format Recommendations and RequirementsThe recommended format is PFX
a digital certificate that is applied to a domain and all its subdomains. Wildcard notation consists of an asterisk and a period before the domain name. Secure Sockets Layer (SSL) certificates often use wildcards to extend SSL encryption to subdomains. for the CN . For example *.base.domain.com with *base.domain.com and base.domain.com as alternative names. The "*base" component of the address serves as a a "fill in the blank" to properly direct to all versions of the address that end in ".domain.com"Certificate Format Recommendations and RequirementsThe recommended format is PFX![]() PKCS #12 defines an archive file format for storing many cryptography objects as a single file. It is commonly used to bundle a private key with its X.509 certificate or to bundle all the members of a chain of trust.The Certificate must be validYou must have the PFX password availableStore the PFX file inside the installation folder (C:\Xpertdoc-SmartFlows).
PKCS #12 defines an archive file format for storing many cryptography objects as a single file. It is commonly used to bundle a private key with its X.509 certificate or to bundle all the members of a chain of trust.The Certificate must be validYou must have the PFX password availableStore the PFX file inside the installation folder (C:\Xpertdoc-SmartFlows).
| 2. | Update the following parameters according to your setup. |
| 2.1. | project.baseurl: the address of your XSF |
| 2.2. | server.ssl.key-store. |
| 2.3. | server.ssl.key-store-password: replace with the password of your certificate. |
| 2.4. | server.ssl.key-store-type: do not change. |
| 2.5. | project.datasource.jdbc-url. |
| 2.6. | project.datasource.username. |
| 2.7. | project.datasource.password. |
| 2.8. | sample.user.password: choose a password for your first login (It will be changed at the initial project setup). |
JWT tokens
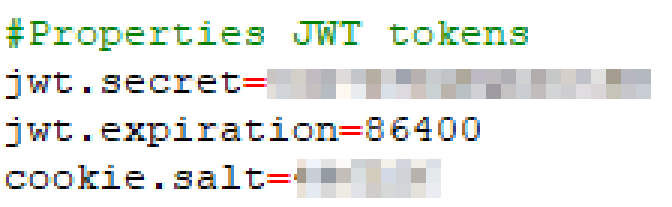
IMPORTANT Do not use the exact values mentioned in the below table, these are only examples for the jwt.secret and cookie.salt values.
|
Property |
Description |
Required |
Value |
|---|---|---|---|
|
jwt.secret |
The secret is used when signing and validating JWTs provided by Smart Flows. |
No (highly recommended) |
Randomly chosen Example: 1e38b0lMFqccDuOA |
|
jwt.expiration |
The duration in seconds for which a JWT is valid. |
No | 86400 (= 24 hours) |
|
cookie.salt |
The value is used to encode cookie stamp. If not set, it will get generated on startup. This means all user sessions will be invalid on restart of the server. |
No |
Randomly chosen* Example: 797204 |
Configuring DocuSign (Optional)
If you want to configure DocuSign, you need to make changes to the application.properties file. Refer to DocuSign (E-sign) connector set up for more details.
Update the Smartflows-server.xml file
The file can be found in the project folder. Update the content of the file to reflect role of the server.
<service>
    <id>smartflows-server</id>
    <name>Xpertdoc Smart Flows Server</name>
    <description>Xpertdoc Smart Flows Server</description>
    ...
</service>
To differentiate multiple Smart Flows servers on the same machine, change the service parameters as follows:
| 1. | Rename the service id from ‘smartflows-server’ to ‘smartflows-prod’. |
| 2. | Rename the service name to ‘Xpertdoc Smart Flows Prod’. |
Install Smart Flows using Docker
Prerequisites: Docker for Windows, Notepad ++
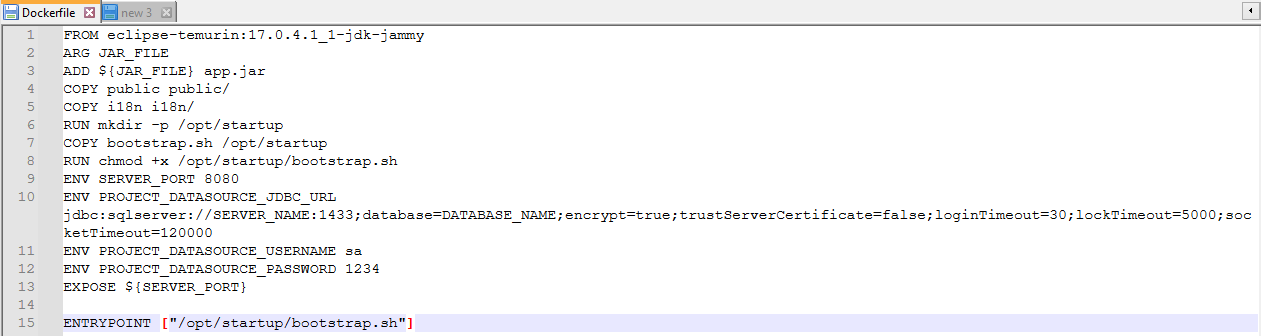
| 1. | Download the Dockerfile zip file and extract. All properties normally in the application.properties file must now be listed in the Dockerfile. |
| 2. | Using Notepad ++, edit the Dockerfile. Use capital letters and underscore instead of period. |
You must use capital letters and underscores instead of periods for Docker to read the file.
| 3. | Unzip the server component zip file and place the unzipped files with the Docker files. |
| 4. | From the command line go to your current location and type: |
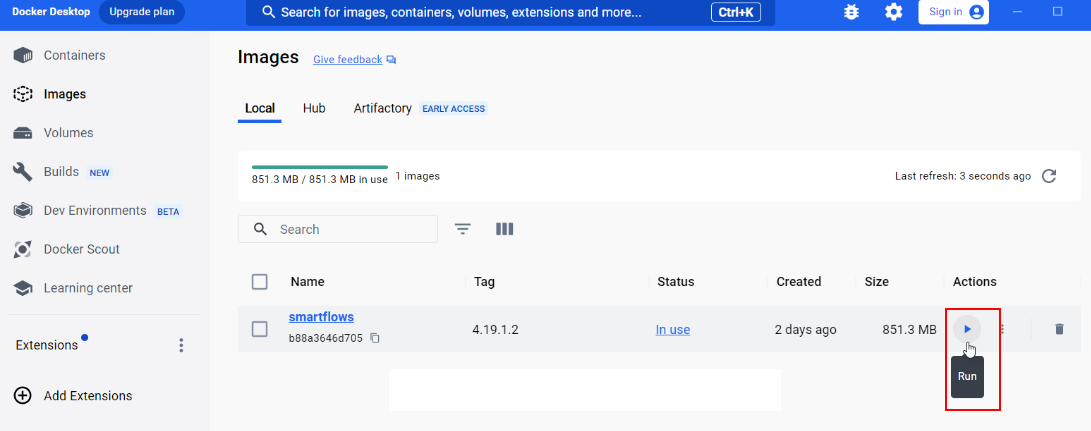
docker build . --build-arg JAR_FILE=smartflows-server-4.19.1.2.jar -t smartflows:4.19.1.2| 5. | From the Docker Desktop, select the Run button. |
Smart Flows opens in the Docker container.